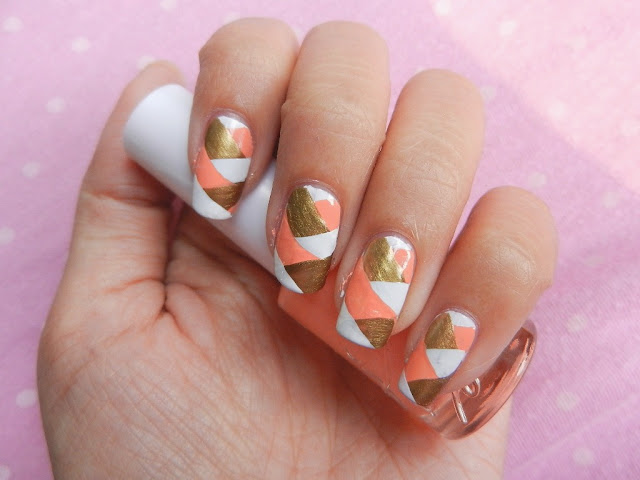
Braided Nails Tutorial
Hi everyone, it's nail art time!
Udah lamaa banget aku enggak nail art, gara-gara kesenengan utak-atik kutek baru yang belum dicoba semua. Braided hair is sooo in right now, so let's try braid on nails.. Braided nails ini mudah murah meriah karena enggak perlu pake alat khusus, just use your freehand :D
Udah lamaa banget aku enggak nail art, gara-gara kesenengan utak-atik kutek baru yang belum dicoba semua. Braided hair is sooo in right now, so let's try braid on nails.. Braided nails ini mudah murah meriah karena enggak perlu pake alat khusus, just use your freehand :D
I'll show you how to do this pretty nails, check this out!
Good thing about this nail art is you can mix colour as you want: pastel, neon, etc. But for better result, mix different formulas of nail polish such as creamy, glittery, and pearlescent. Pemilihan warna sangat mempengaruhi hasil akhirnya, jadi pilihlah kombinasi warna yang serasi.
 |
| I'm using: OPI Alpine Snow, Etude Nail Polish, H&M Back by Noon |
Let's get started!
 |
| 4,5,6. Secara berurutan ulaskan kuteks sesuai urutan warna. I used no extra tools, just use brush from the polish bottle. Setelah selesai, pulaskan top coat. |
TADAAAA... Finish!
It's easy right? All you need is practice and extra-patient, soalnya kamu harus menunggu setiap layer kering sebelum mengaplikasikan warna berikutnya.
Tips: gunakan kuteks dengan ukuran kuas yang hampir sama, sehingga hasil pulasan sama besarnya :)
Enjoy this tutorial,
have a nice day!
xoxo


simple, easy, and cute ^o^
ReplyDeletethank you tutorialnya~
ReplyDeletepretty!
ReplyDeletelove the color combo!
i watched this on yt but your tutorial is easier :)
ReplyDeletedo you want to follow each other?
visit my blog ^^
www.luchluchcraft.blogspot.com
Eh keliatannya gampang! Mau ikutan aahh~~ hihihi
ReplyDeletemakasih buat informasinya http://gg.gg/26ieh
ReplyDelete